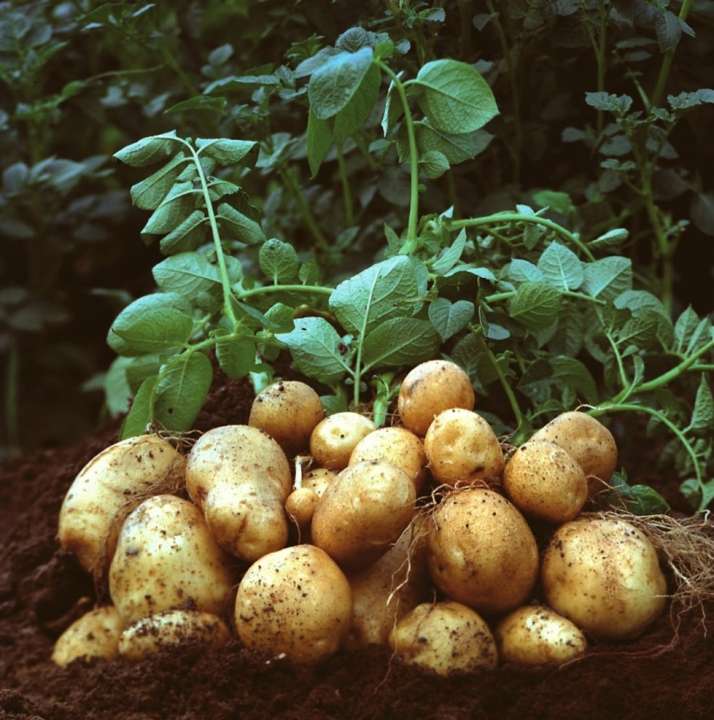
 We stock all the popular varieties of Seed Potatoes such as Nicola, Wilja, Desiree, Charlotte and many more available from the middle of January. Never grown your own potatoes? It’s simple, you can even grow them in pots and containers! Find out more…
PLANNING THE CROP
Potatoes fall into three main categories, First Early, Second Early and Maincrop. First Earlies form potatoes very early, and are usually harvested in June, July and August, when the haulm (stems & leaves) are still green. Maincrop varieties are lifted in the autumn when the haulm has died down. It is the Maincrop varieties that are ‘long keeping’ and are relied upon for winter storage.
Potatoes grow best in an open position, which must not be an area that is prone to frost. If grown
in the shade the haulm, or green top, becomes lank and spindly as it searches for light. Potatoes grow reasonably well in most soils, but the best results are obtained from land that has been well manured. Dig the ground in autumn or winter, working in compost or well-rotted manure at the rate of a bucketful to the square yard.
A fortnight before planting dress the ground with Growmore at a rate recommended by the manufacturer. Alternatively, for organic growing apply a general fertiliser such as Fish, Blood and Bone at 2-3oz per square yard (60-90g per square metre).
POTATO SEED
When choosing potato “seed”, it is important that “Certified Seed” is planted. Such seed has been inspected and grown under rigid conditions, so that it is certified virus-free. All seed potatoes sold at Carpenter’s are certified.
PREPARING SEED POTATOES FOR PLANTING
Having bought your seed potatoes take them from their bags and put in a cool, well-ventilated place. Set them in seed trays with their ‘eyes’ facing outwards so that the sprouts will grow, this is known as ‘Chitting’. Chitting is vital for early varieties and is useful for Maincrop up until early March.
Place the trays in a cool room or greenhouse. In four or five weeks the sprouts should be sturdy and ideally half an inch to one inch (12-25mm) long. Sprouted in this way the potatoes have a longer growing season and produce a heavier crop.
Plant First Early potatoes between mid-March and early April. Plant Second Earlies in early April and Maincrop varieties towards the end of the month. Use a draw hoe to make a ‘V’ shaped channel 4″ (10cm) deep and set the potatoes at the bottom of the channel so that the sprouts are pointing upwards. Plant First Earlies 12″ (30cm) apart and 2” (60cm) between the rows.
Main crops will need more room to develop – 15″ (40cm) between the tubers and 36″ (90cm) between the rows. If some of the tubers are on the large side they can be cut in half providing there are two or three healthy shoots on each half. The ideal size of a seed potato is about the size of a hen’s egg.
When the first shoots appear draw soil over them with a hoe to create a ridge, increasing the height of the ridge as protection from late frosts. Continue to build up the ridge (earthing) when the shoots are about 9″ (230mm) high, and again a one/ two weeks after that. Continue earthing at intervals until the foliage meets between the rows.
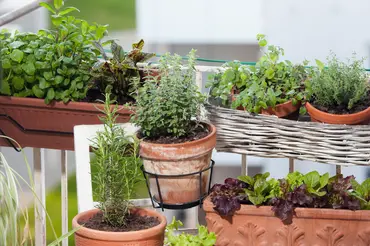
Early Potatoes may be grown in containers, large pots or tubs that are at least 40cm deep are ideal. Rest chitted tubers on 4/5” (10-13cm) of compost in your chosen container and then cover with 4” (10cm) of compost. Water them in and stand in a light sheltered spot. When the stems are 6” (15cm) tall add a further 4” (10cm) of compost, repeat until the plants have grown to 2” (5cm) over the top of the container.
POTATO PEST AND DISEASES
Many diseases, pests and disorders can attack potatoes and reduce yields, but only four are likely to be a serious threat. These are potato cyst eelworm, slugs, wireworm and blight.
An attack of potato cyst eelworm will make the plants appear weak and stunted. Lower leaves wither away, upper leaves are pale green and wilt during the day. Haulm (Foliage) dies down prematurely, marble-sized tubers are produced.
Prevention: Practice crop rotation, especially in light soils. Do not grow potatoes or tomatoes on infected land for at least 6 years.
Slug attacks occur in damp conditions. Slugs can ruin Maincrop potatoes grown in heavy soil.
Prevention: Avoid over-manuring, apply a slug control in July. Lift the crop as soon as the tubers are mature.
Blight is the most serious potato disease, capable of destroying all the foliage during August in a wet season. The first signs are brown patches on the leaves. Look on the underside of the leafs, each blight spot has a white mould fringe in damp weather.
Prevention: Plant healthy seed tubers. Spray with Bayer Garden Fruit & Vegetable Disease Control Protective Fungicide in mid-June to mid-August at 10-14 day intervals while weather is damp and warm. If blight spots are already present spraying will slow down the spread of the disease to other plants.
HARVESTING AND STORING POTATOES
Potato-lifting time varies considerably from one part of the country to another depending on prevailing climatic conditions. As a rough guide you should be able to gather a few new potatoes when after about 12-14 weeks of planting.
To harvest a few early potatoes before the crop as a whole is ready for digging, brush away a little soil from the sides of a ridge and remove any potatoes that have grown to the size of a hen’s egg. Replace the soil over the smaller tubers and leave them to grow. They should at least double in size during the next or three weeks, after which the crop can be lifted as required.
When lifting potatoes, insert the fork at least 6″ (150mm) away from the stems to avoid impaling the tubers. Push well into the side of the ridge so that the plant can be lifted and thrown between the rows in a single action.
Maincrop potatoes take at least 20 weeks to come to full maturity and ready for storing. Some may be dug a few weeks earlier, but they will have to be used immediately since the skins will not yet have set.
Before lifting the entire crop, test one or two potatoes by rubbing the skin with your thumb. If the skin of the tuber does not rub off, the crop is ready for storing. Store potatoes in a dry, cool, but frost-free place and place them in lightproof but ventilated containers such as boxes or hessian sacks. Pile them on a dry floor and cover with straw.